Altium DXP Developer
Reference information
Through the use of software Extensions, Altium Designer’s extensible architecture provides a flexible installation approach and an open, modular path for future development. Altium Designer extensions customize and extend Altium Designer’s functionality by the application of targeted software packages, which are installed through the Altium Designer Extensions & Updates Interface.
For more detailed information about installing and managing Altium Extensions see Extending Altium Designer.
The Altium DXP Developer extension takes this approach to the next level by providing the software framework and resources that are needed to develop, install and distribute your own custom extensions for Altium Designer.
The Altium DXP Developer is itself distributed as an extension for Altium Designer – in effect, it is an extension that allows you create extensions. When installed, the Altium DXP Developer extension is composed of several parts:
- The DXP Developer Interface – the functional user interface for managing, editing, installing and publishing (distributing) custom extensions.
- The Altium Software Development Kit (SDK) – the Application Programming Interface (API) source files, in multiple programming languages, for developing Altium Designer Extensions.
- Software templates – the basic software structure for creating new extensions
- Extension project examples – a large number of software extension projects created to demonstrate the development structure and capabilities of Altium Designer extensions.
Installing the Altium DXP Developer extension
The Altium DXP Developer extension is installed through Altium Designer’s Extensions Management interface, accessed from the Admin view on the Altium Designer Home page, or by selecting the Extension and Updates option from the DXP menu (![]() ).
).
Choose the Purchased tab, locate the Altium Developer entry in the gallery’s Software Extension section and click its ![]() icon to install.
icon to install.

Install the 'Altium Developer' extension from the Purchased tab in the Extensions & Updates interface.
After a successful installation the Altium DXP Developer extension should appear under the Installed tab on the Extensions & Updates page.
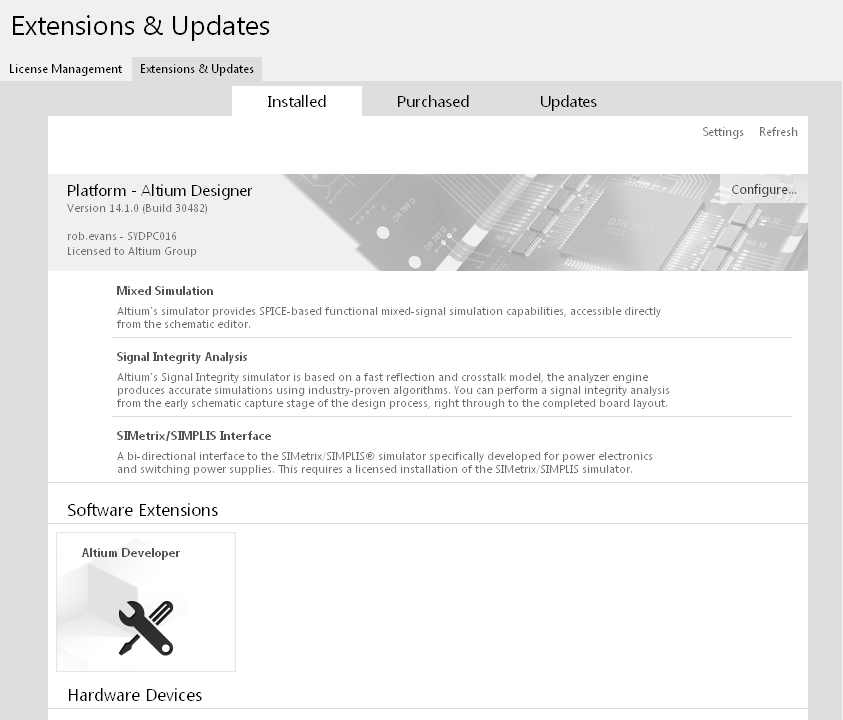
Check for a successful extension install in the Installed tab of the Extensions & Updates page.
Creating a new Extension Project
The DXP Developer extension implements a new file type in Altium Designer called an Extension Publishing Document, stored as a *.EPD file. This is a straightforward XML-type file that specifies an extension’s publishing configuration details and descriptive product-related information such as product name, version, long and short descriptions, icon thumbnails and licensing information.
To start a new software extension project, open a new EPD file in Altium Designer by selecting File » New » Other and choosing the Extension option. This opens the New Extension dialog where the extension’s name, its project folder and the programming configuration are specified.

Specify the new extension project ID/path and the development language type/version to implement the extension structure.
Note that the Altium SDK includes API source files and example projects for the Embarcadero Delphi®, Microsoft C# (C-sharp) and C++ (Cpp) development languages.
With the New Extension dialog information completed and dismissed, the DXP Developer interface will open to show the new extension’s configuration settings (LH pane) and publishing data entry fields (RH pane).
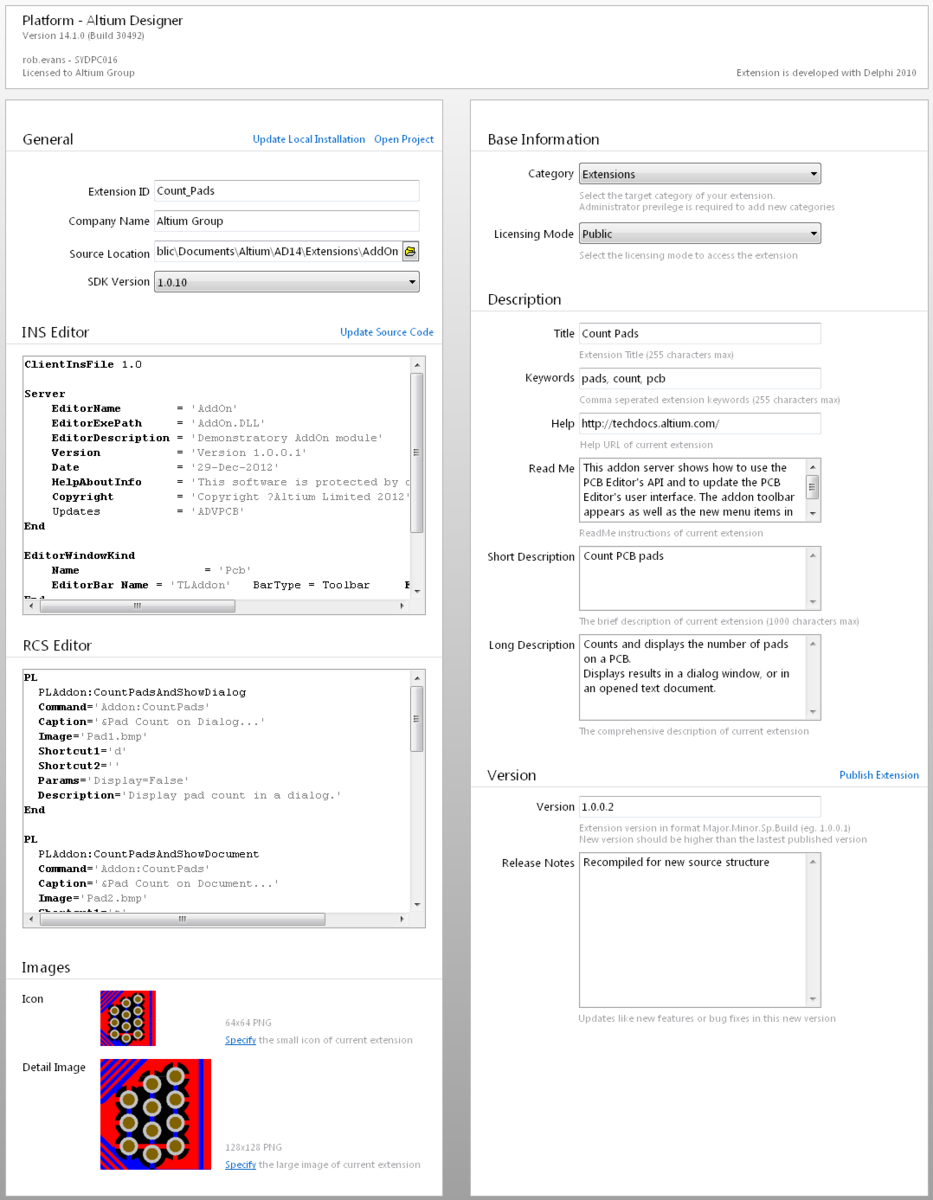
The DXP Developer interface acts as an EPD file editor, config file editor, software extension installer and secure file distributor for custom Altium Designer extensions.
The Altium DXP Developer interface is the central point for creating and preparing extension projects for wider distribution. Along with acting as an EPD document editor, the interface also provides the following command functions:
- Open Project – Launches the development environment (IDE) configured for the current extension project, usually Embarcadero Delphi or Microsoft Visual Studio.
- Install/Update Extension – Installs the extension in Altium Designer or updates the existing extension installation.
- Update Source Code – Saves the code in the INS Editor and RCS Editor panels to their respective configuration files (*.ins and *.rcs) in the project source location’s Installation folder, when the EPD document is saved.
- Publish Extension – Upload the extension and its associated files to a target Vault repository.
Coding
When a new Extension Publishing Document (EPD) is opened in the Altium DXP Developer it automatically creates a programming project structure and the IDE project files to suit the selected language and IDE version. Extracted from the preconfigured Developer templates, the files and folders reside in the extension project source folder (such as C:\Users\Public\Documents\Altium\AD14\Extensions\MyExtension) and provide a convenient and structured framework for coding a new extension.
To begin coding the new extension’s functionality, launch its associated IDE with the Open Project command link.
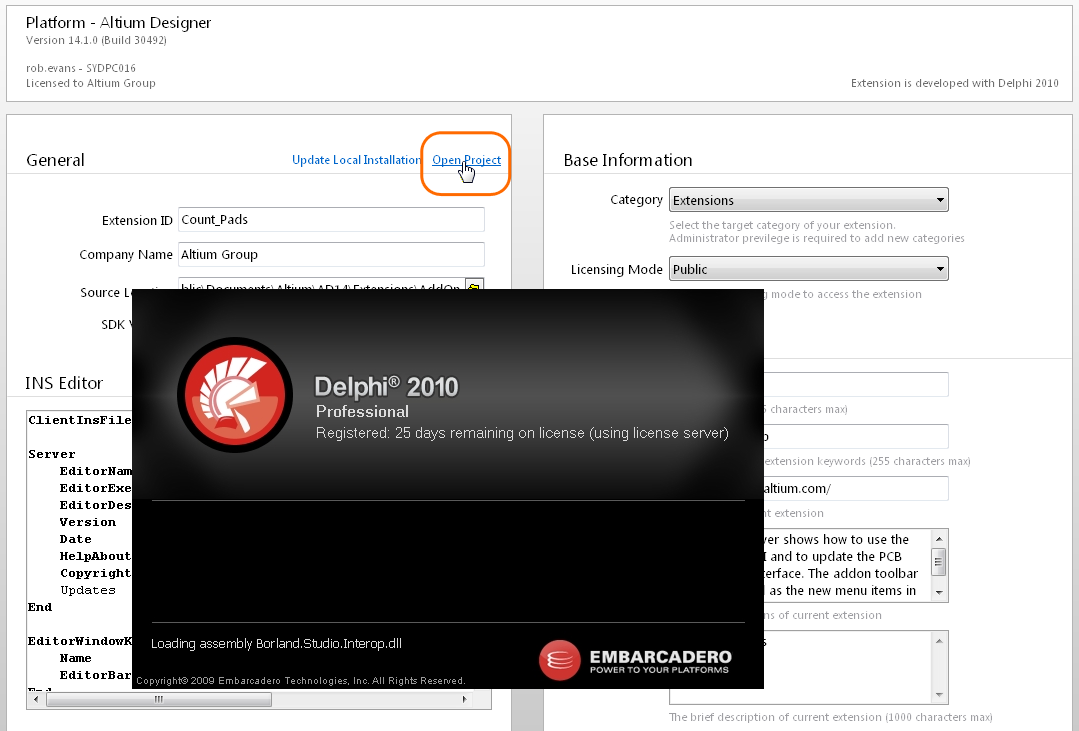
Launch the associated programming language IDE with the Open Project command link.
Along with the DXP Developer Interface and its programming templates, the DXP Developer extension installation also adds SDK source code files and example projects for each programming language. These SDK resources can be found in the C:\ProgramData\Altium\Altium Designer {*GUID*}\Extensions\Altium Developer\SDK folder. The Examples folder in each language variant contains a large number of extension projects to provide a programming reference and guide for developing your own Altium Designer extensions.
In the case of the language source files, these must be correctly referenced in the IDE project. To check, open the project’s build options (in Delphi: Project » Options » Delphi Compiler) and determine that the Search path includes the appropriate SDK source folder(s).
Also note the target folder for the extension’s compiled DLL output – for Delphi, this is the Output Directory path entry in the Options dialog. The target path should point at a matching project folder in Altium Designer’s main extension folder, for example C:\ProgramData\Altium\Altium Designer {*GUID*}\Extensions\MyExtension – as noted above, this folder is created when a new EPD document is opened in the Developer Interface.
When an extension’s project code is compiled, the IDE places the resulting DLL (say, MyExtension.dll) in the matching folder (\Extensions\MyExtension). In turn, Altium Designer will detect and respond to the new extension folder and contents when it starts.
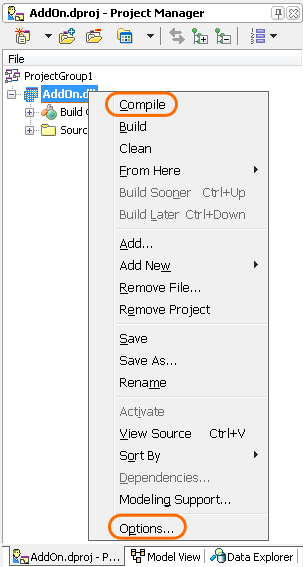
In Delphi, right click the output DLL reference or use the Project menu to access the Compile command and Options setup dialog.
Compile your code, then restart Altium Designer to load the new extension project and its functions.
Extension installation and update
The extension installation feature in the DXP Developer interface, basically, registers the extension project with Altium Designer by inserting a matching entry in the system’s Extensions Registry - C:\ProgramData\Altium\Altium Designer {*GUID*}\Extensions\ExtensionsRegistry.xml.
This process is automatically instigated, along with creating the project structure, when defining a new extension project by opening a new EPD file in the DXP Developer interface. As a result the Developer’s install command is set to Update Local Installation, as opposed to Install Extension.
During the extension development process the Update Local Installation command can be used to update the extension configuration and files in Altium Designer. Note that for a full test of the extension code’s functionality, the code project must be recompiled to update its DLL in the matching Altium Designer extensions folder.
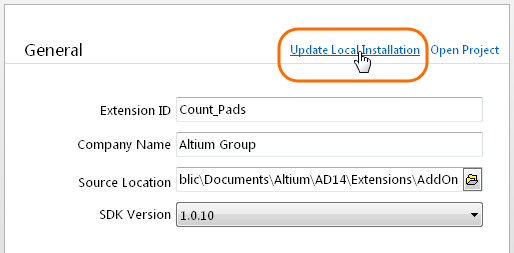
Update the extension's installation in Altium Designer with the Update Local Installation command link.
To install or edit an existing extension project, open its associated EPD file from Altium Designer’s main menu – File » Open. Select Extension Publisher files (*.EPD) from the file type drop-down menu, then browse and select the project EPD document, which will open in the DXP Developer interface as an extension editor. If the extension is not already installed, it can be registered with Altium Designer by clicking the Install Extension command then recompiling the project in its IDE – click Open Project to start the IDE, then compile the code.

An existing extension project can be installed in Altium Designer by loading its EPD document and clicking on the Install Extension command in the DXP Developer interface.
To check that an extension project is installed in Altium Designer, go to the Extensions & Updates page and select the Installed tab. The extension project should be visually indicated as installed and be selectable by clicking on its name.
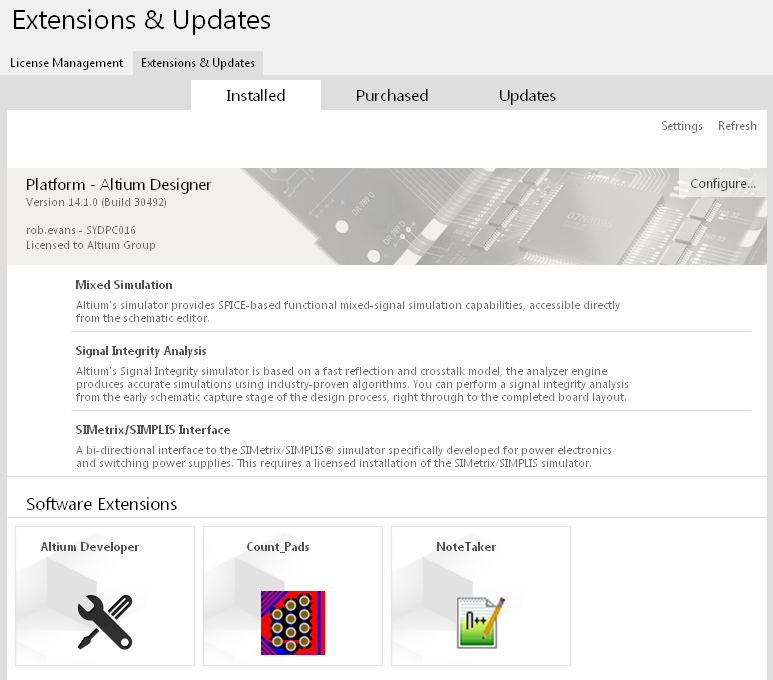
Installed DXP Developer extension projects can be installed and managed in Altium Designer via the Extensions & Updates page.
Like any other extension in Altium Designer, a custom extension can be removed by clicking its associated uninstall icon (![]() ), or if selected, by clicking on the Remove button. Note again that the process is not complete until Altium Designer has been restarted.
), or if selected, by clicking on the Remove button. Note again that the process is not complete until Altium Designer has been restarted.
Uninstall using the associated icon, or if its details are open (by clicking on the extension name), click the Remove button.
Update an Extension’s source files
While brought together in the DXP Developer interface, the composite parts of an Altium Designer Extension project are edited and saved by different processes in different circumstances. More specifically:
- The programming code base – edited, saved and recompiled in the matching IDE.
- The Extension Publishing Document (EPD) – created, edited and saved in the DXP Developer's extension editor interface
- The extension install and resources files (*.ins and *.rcs) – can be created and edited in any text editor, or as detailed below.
To streamline the task of working with the extension configuration (install/resources) files, the Altium DXP Developer interface offers programming windows for both the install file (*.ins) and resources (*.rcs) file. These files, like the programming code, are independent of the EPD file itself and therefore require their own editing/save process.
The DXP Developer interface takes care of this without the need to move to an external editor. Clicking the Update Source Code command will save the editor window content to the respective INS and RCS configuration files in the project source folder, and in the process, prompt to save the current EPD document.
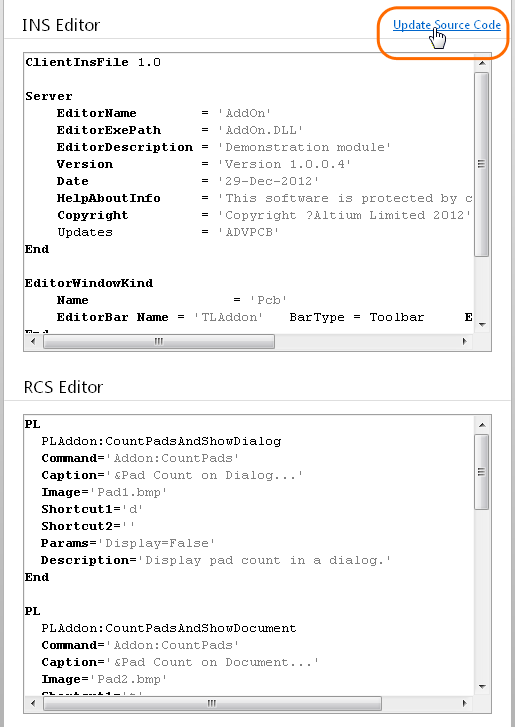
An extension's configuration files, sourced from the project folder, populate the DXP Developer interface editor panels where they can be edited and saved.
When saved, the configuration file changes will be updated in the project source folder, but not implemented in Altium Designer until the extension installation is updated with the Update local Installation command. This updates the appropriate files and configurations the Altium Designer extensions location - C:\ProgramData\Altium\Altium Designer {*GUID*}\Extensions.
Publish an Extension
An extension projects can be published to the Altium Global repository using the Publish Extension command link.
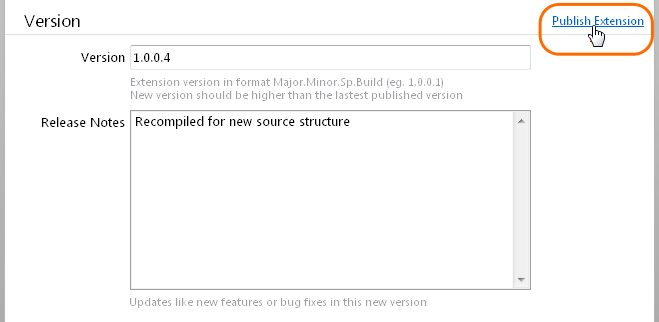
An extension can be published (uploaded) to the Altium Global extension repository for licensed distribution to a targeted user base.
This uploads the extension as a package to the cloud-based vault repository, which can be accessed through the AltiumLive Partner Dashboard at https://apps.live.altium.com. The Dashboard exposes the new extension to other registered users, such as those in a company group, by providing controlled distribution and (if necessary) licensing of the extension.
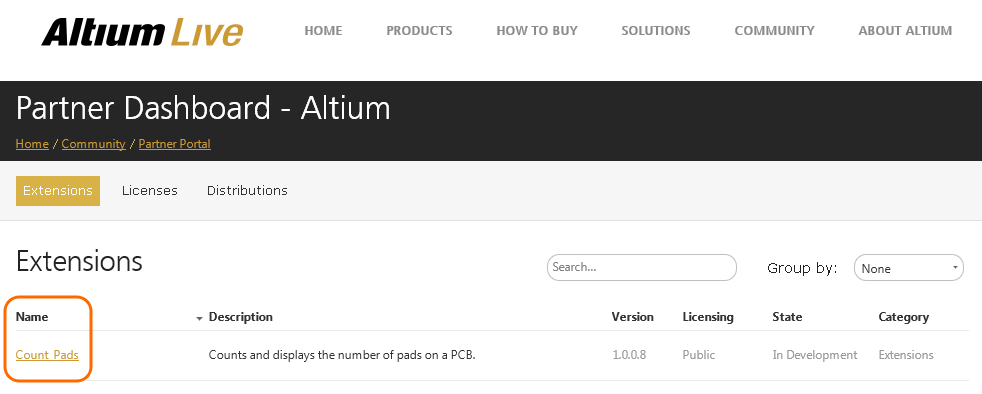
Click on a listed extension in the Partner Dashboard to view its detailed information and expose its Licensing and Distribution options.
The Partner Dashboard’s Licenses and Distribution modes offer facilities to create and apply extension licenses, and manage an extension’s distribution to registered users. Ultimately, it allows a developer's extension to be distributed to the selected audience as a licensed, documented version that can be installed and updated on demand.
With a specific Extension selected it can be assigned a license type (On-Demand, Standalone, etc), and a license created (under the Licensing Options and Licenses tabs, respectively). Choose the Distributions tab to create a specific distribution configuration for the Extension.
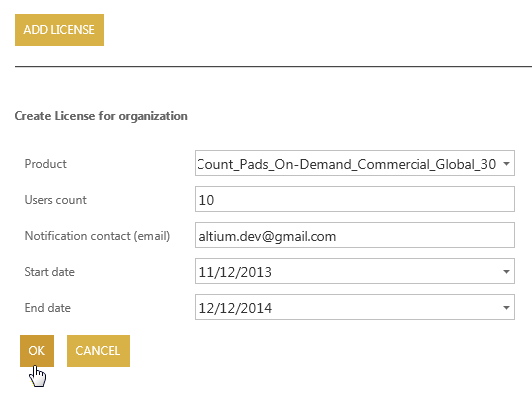
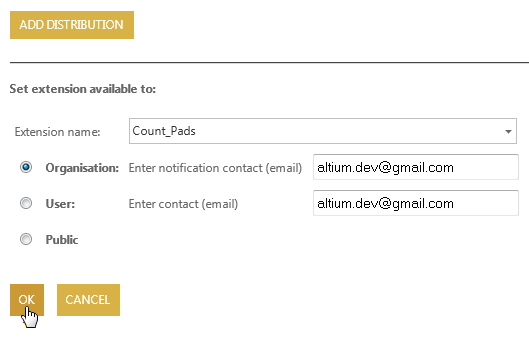
Configure and apply the Licensing (left) and Distribution (right) options for a specific extension.
Update Published Extensions
Once an extension is published, several update capabilities are enabled in the local DXP Developer interface.
Base and Description update commands
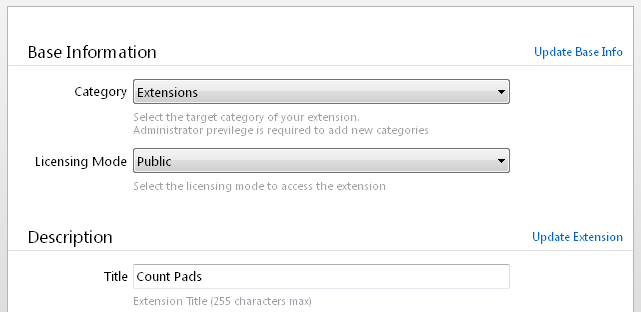
- Update Base Info – For implementing a changed base configuration setup, such as selecting a different Licensing Mode option - say from Public to Use License to assign a matching license created in the Partner Dashboard.
- Update Extension – To update a published extension product’s descriptive information.
Version update commands
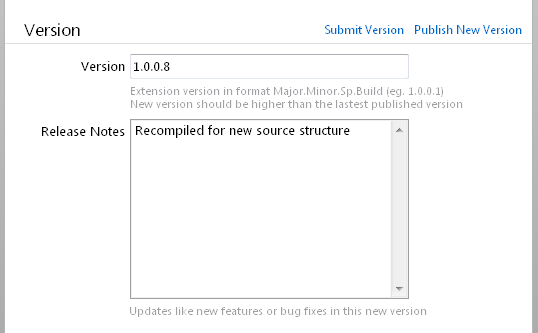
- Submit Version – To update an extension’s lifecycle state from In Development to Submit, prior to being transitioned to the Review then Public states.
- Publish New Version – To upload a newly created version of the published extension, as defined by an incremented Version number.
The results of updates to the published extension can be seen in its Partner Dashboard summary.

Updates to a published extension's Version, License configuration and Lifecycle state shown in the Dashboard.

