Creating a Manufacturing Drawing
Once the wiring diagram and layout drawing are complete, read-only copies of their contents can be placed into the manufacturing drawing and annotated as required. A manufacturing drawing for a harness design is being created in the Draftsman editor.
Setting Up a Manufacturing Drawing Document
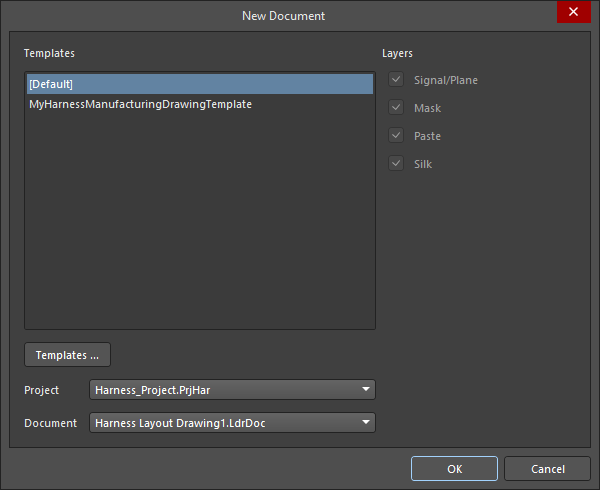
To create a manufacturing drawing for the harness design, a new Draftsman document (*.HarDwf) should be added to the harness project. To do this, right-click the project entry in the Projects panel and then select Add New to Project » Draftsman Document from the context menu (or use the File » New » Draftsman Document command from the main menus). In the New Document dialog that opens, select an available manufacturing drawing template as required and ensure that a correct Project and harness layout drawing Document is selected.
Options of a manufacturing drawing document can be configured in the Properties panel in its Document Options mode, which is active when no object is selected in the document's design space. Refer to the Setting Up a Draftsman Document page to learn more.
Working with Views
In a manufacturing drawing document, you can place read-only views of the harness wiring diagram and harness layout drawing included in this project.
Wiring Diagram View
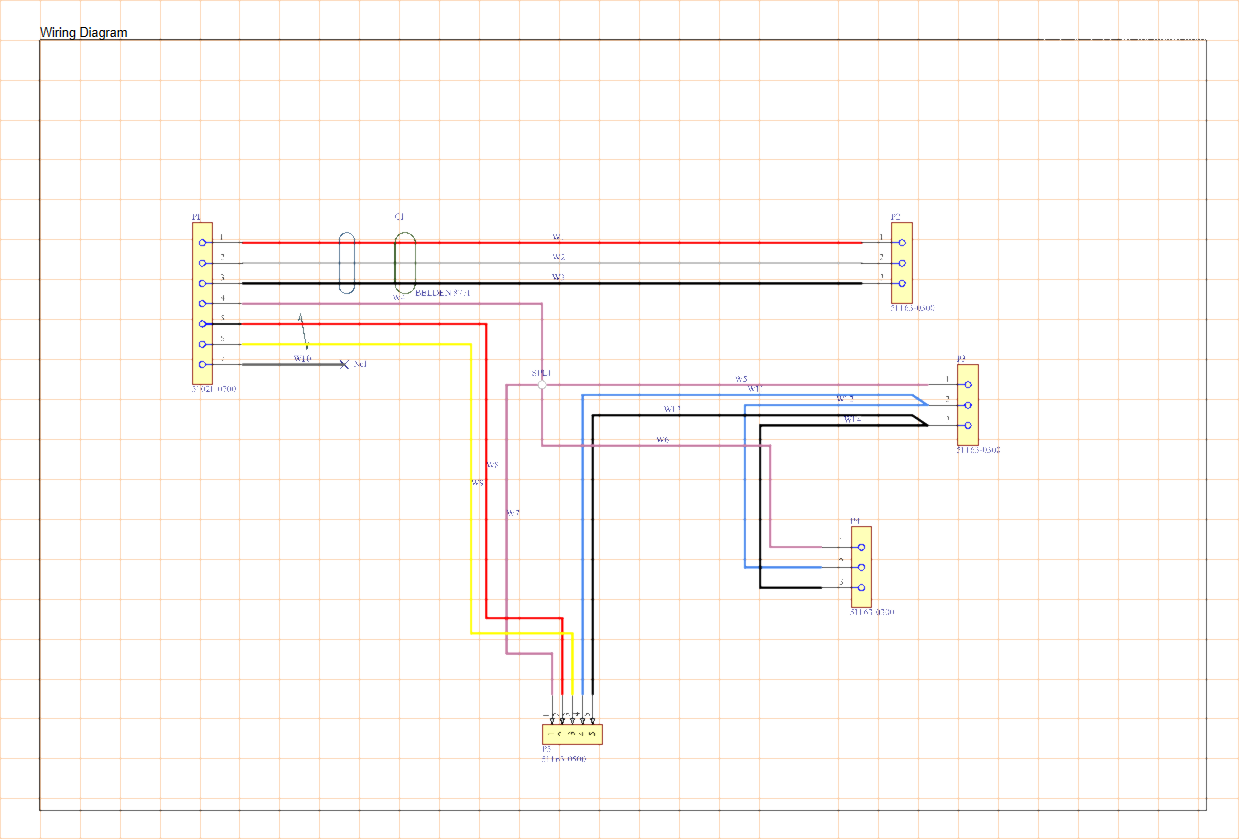
A Wiring Diagram View is an automated graphic composite of the active harness design project's wiring diagram.
A Wiring Diagram View is placed in a manufacturing drawing document by clicking the ![]() button in the Active Bar or selecting the Place » Wiring Diagram View command from the main menus.
button in the Active Bar or selecting the Place » Wiring Diagram View command from the main menus.
The properties of a placed Wiring Diagram View can be configured in the Properties panel when the view is selected in the design space.
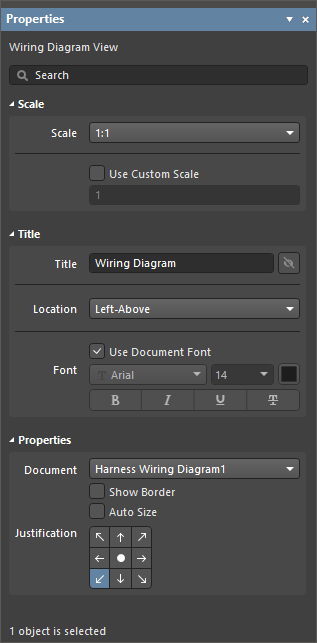
The Properties panel in Wiring Diagram View mode
Using Multiple Wiring Diagrams for Wiring Diagram View Generation
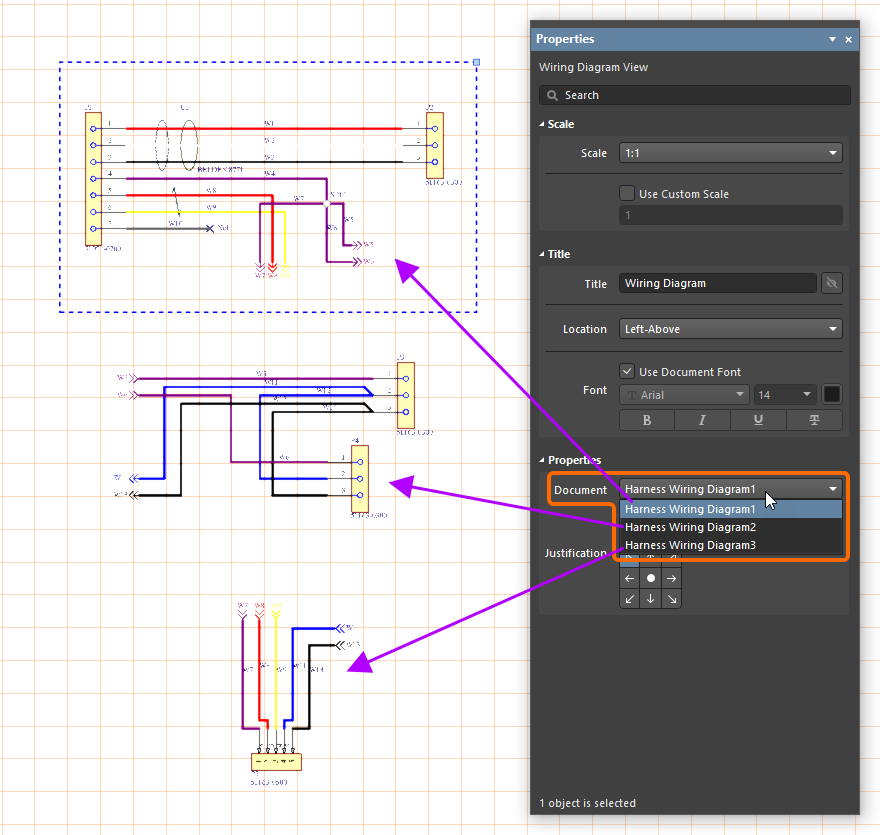
You can have multiple Wiring Diagram documents (*.WirDoc) in the same project, so you can choose the wiring diagram document from which a placed wiring diagram view should be generated and updated. Use the Document drop-down in the Properties region of the Properties panel when the wiring diagram view is selected to choose the wiring diagram document for this view.
Layout Drawing View
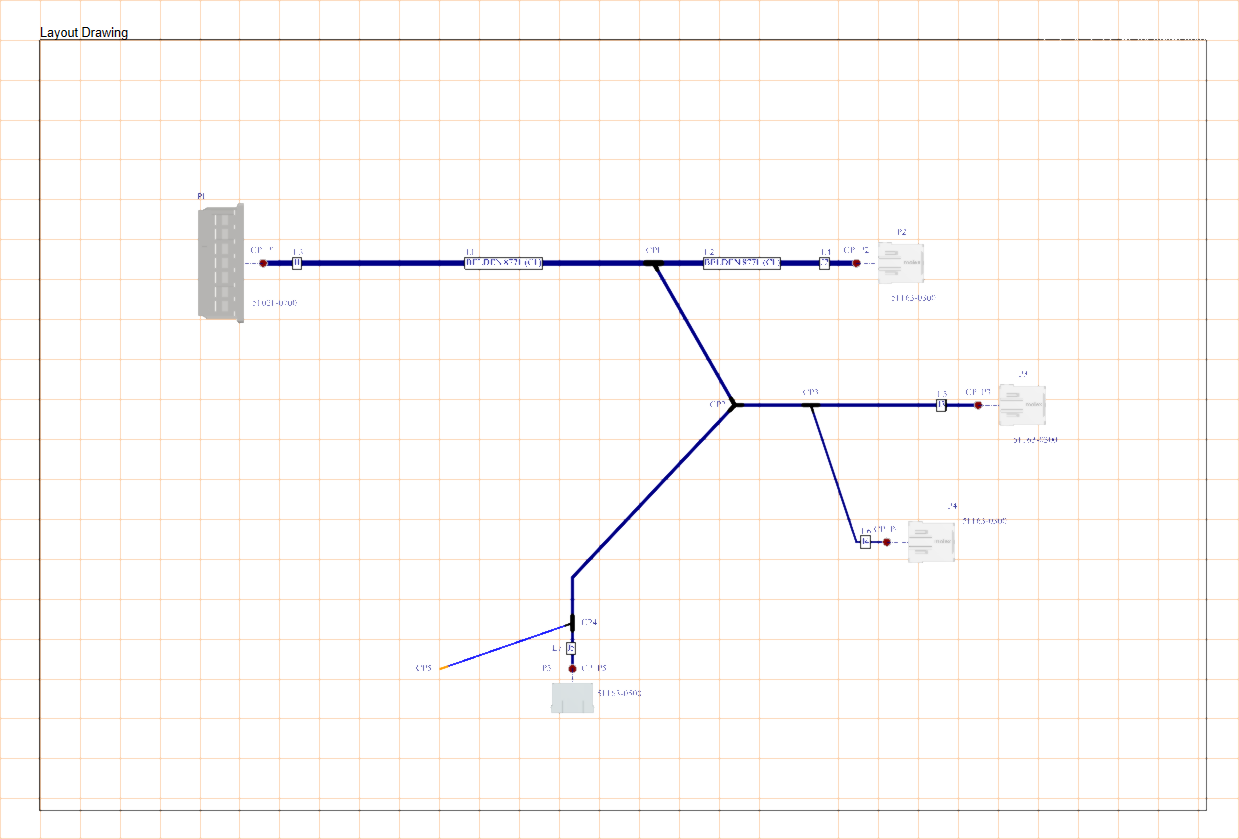
A Layout Drawing View is an automated graphic composite of the active harness design project's layout drawing.
A Layout Drawing View is placed in a manufacturing drawing document by clicking the ![]() button in the Active Bar or selecting the Place » Layout Drawing View command from the main menus.
button in the Active Bar or selecting the Place » Layout Drawing View command from the main menus.
The properties of a placed Layout Drawing View can be configured in the Properties panel when the view is selected in the design space.
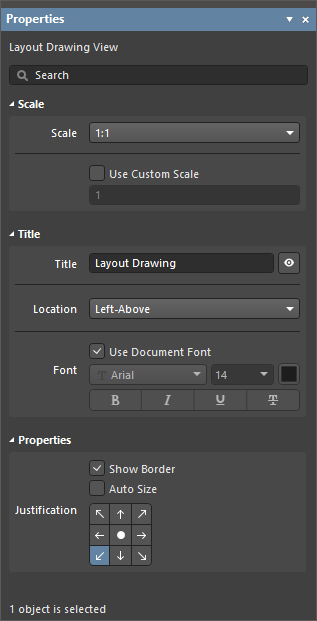
The Properties panel in Layout Drawing View mode
Additional Views
Additional views can be used to complete your manufacturing drawing: Harness Detail View and Component View.
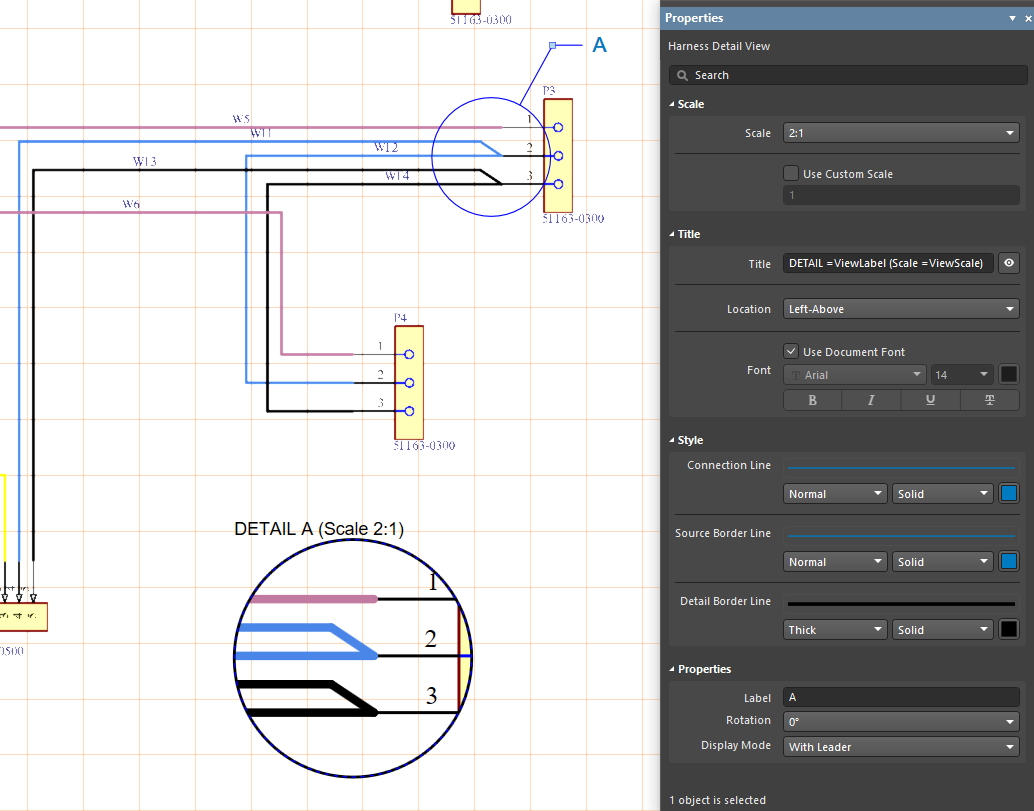
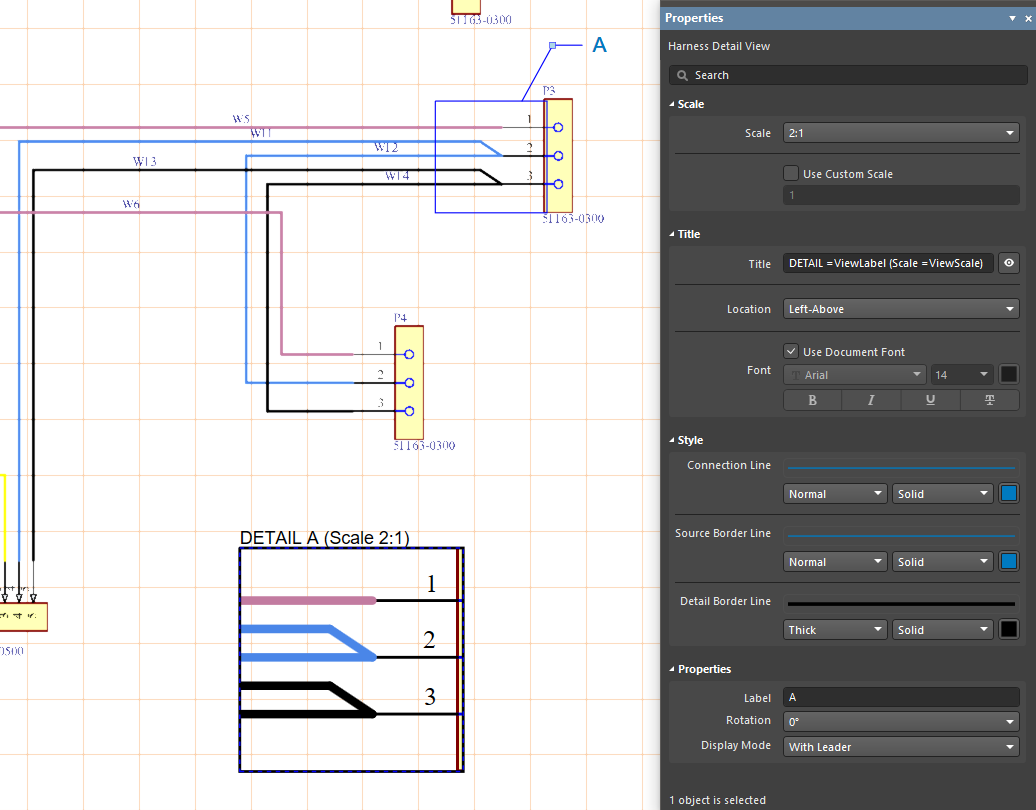
The Harness Detail View allows a defined area of an existing drawing that is a floating, magnified view of its detail. The Harness Detail View is placed in a manufacturing drawing document by selecting an option from the ![]() button menu on the Active Bar or via the Place » Additional Views » Harness Detail View menu options. Two options are available for the Detail View area: Circle area detail view and Rectangle area detail view.
button menu on the Active Bar or via the Place » Additional Views » Harness Detail View menu options. Two options are available for the Detail View area: Circle area detail view and Rectangle area detail view.
|
An example circle area Harness Detail View applied to a Wiring Diagram View An example rectangle area Harness Detail View applied to a Wiring Diagram View |
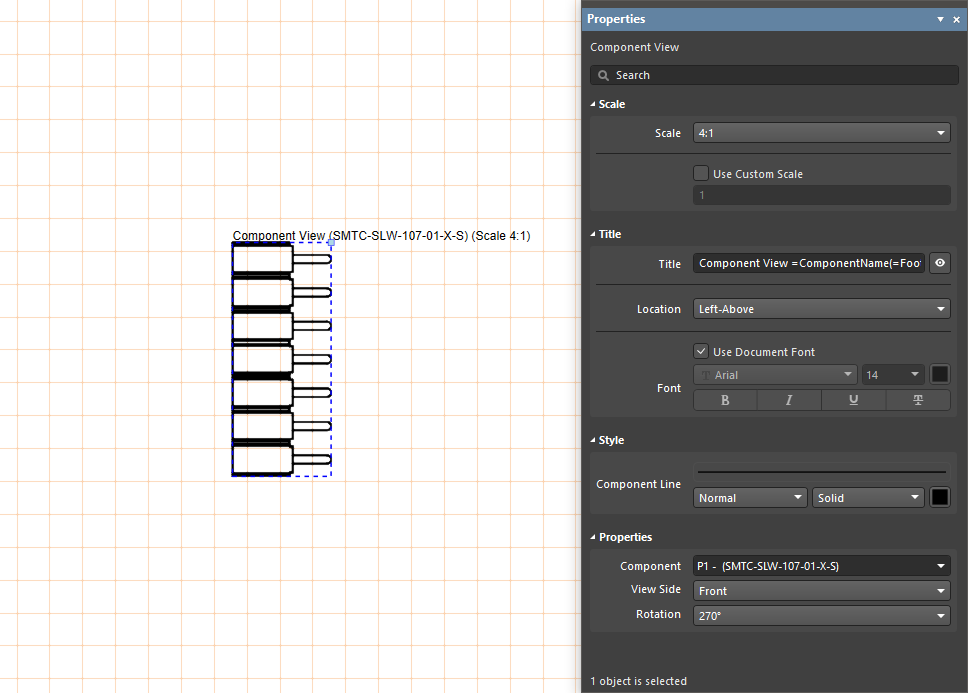
The Component View is a drawing view of a single component from the current harness design. The Component View is placed in a manufacturing drawing document by selecting the Place » Additional Views » Component View command from the main menus.
Drawing Annotation and Dimensioning
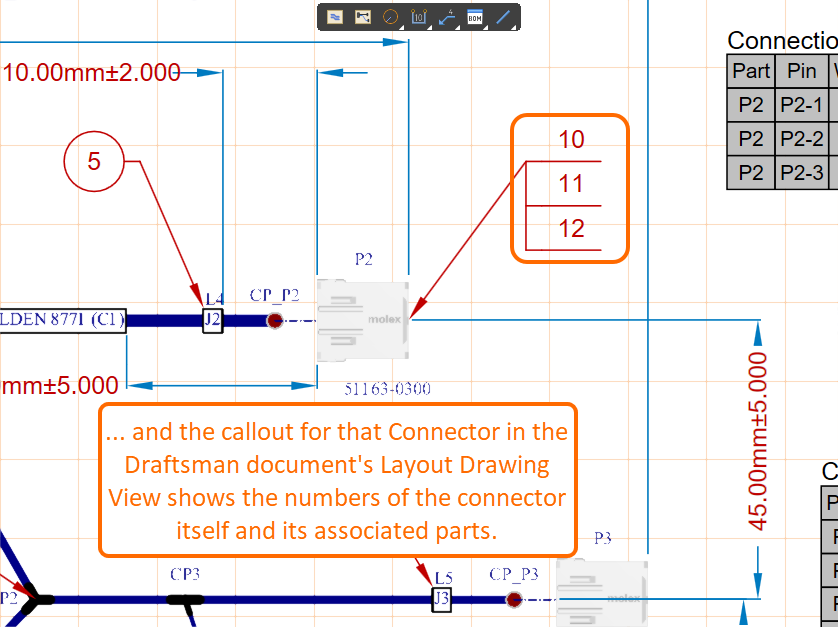
A range of additional annotation, dimensioning and drawing tools are provided to add important information to a manufacturing drawing. These include automated note and highlighting systems, as well as tools to indicate the lengths, sizes, and angles of the object outlines, or the distance between nominated objects.
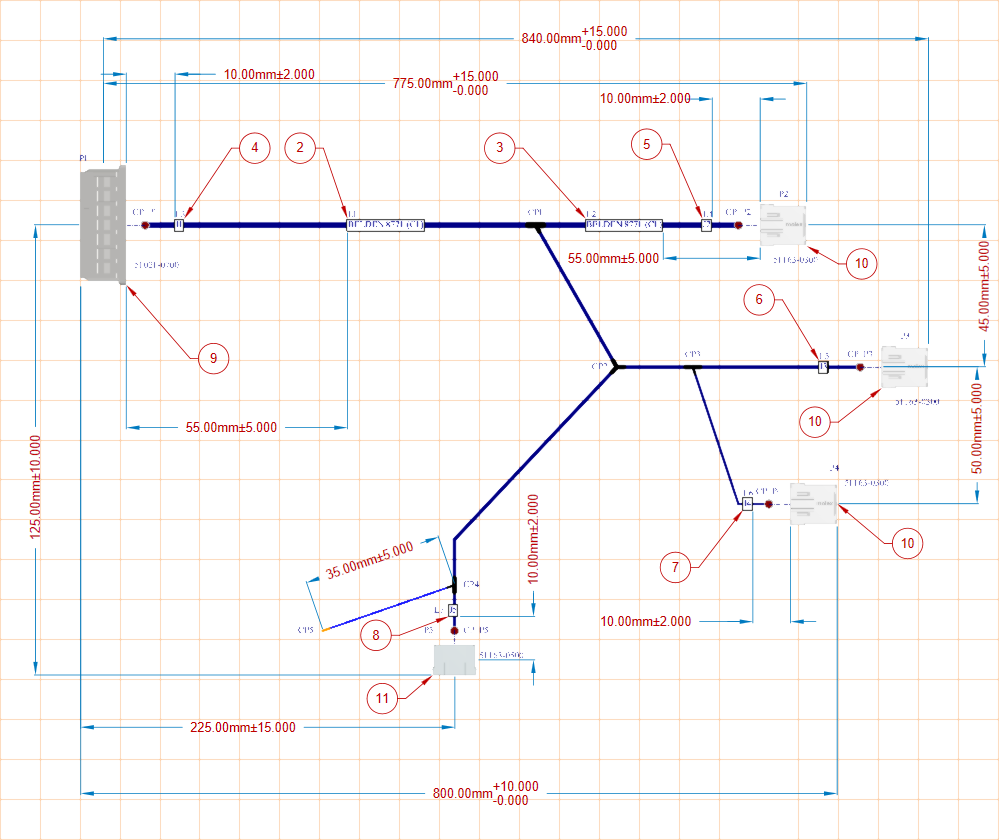
An example of an annotated Layout Drawing View
Working with Tables
A manufacturing drawing document allows a Bill Of Materials (BOM), Wiring List, Connection Table, and a generic Table to be placed on the drawing. The tabular data is directly derived from the project files and provides a simple, visual way to convey crucial information for the harness manufacturing processes.
Wiring List
A Wiring List is an automatically generated table object that displays the start and end points and parameter values for each wire in the harness.
To place a Wiring List, select the Place » Wiring List from the main menus or use the Wiring List command from the Active Bar.
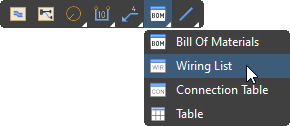
Select the placed Wiring List to access its property settings in the Properties panel. This provides configuration options for most aspects of the Wiring List, including its visual attributes and data content.
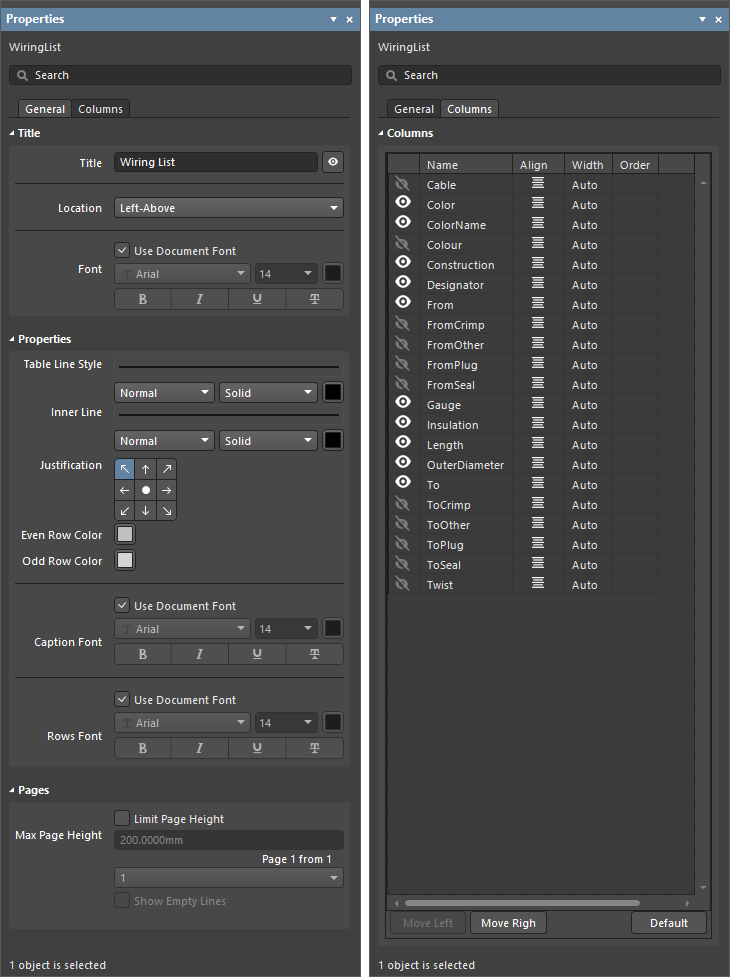
The Properties panel in its WiringList mode (the General and Columns tabs)
Splitting a Wiring List
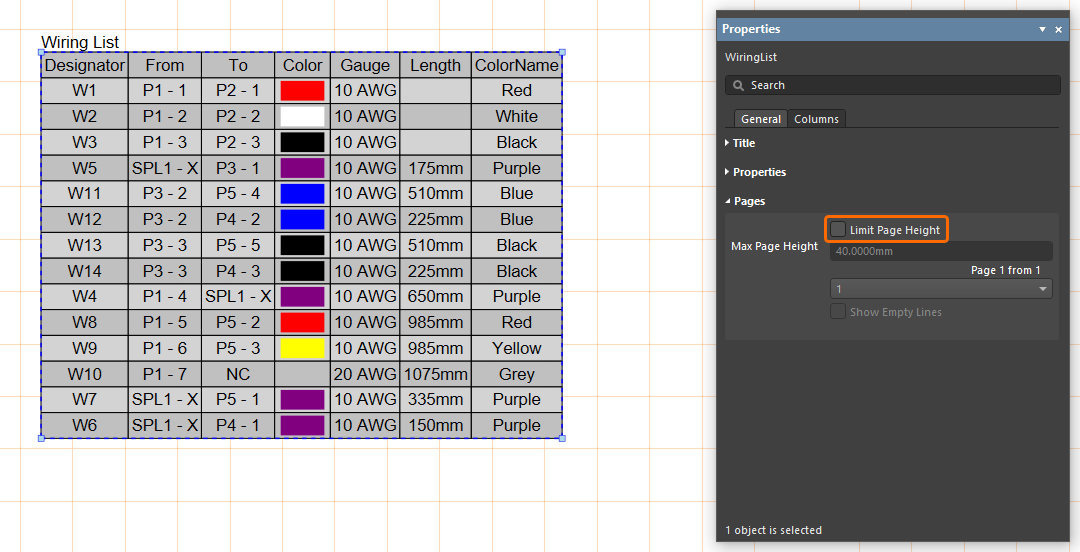
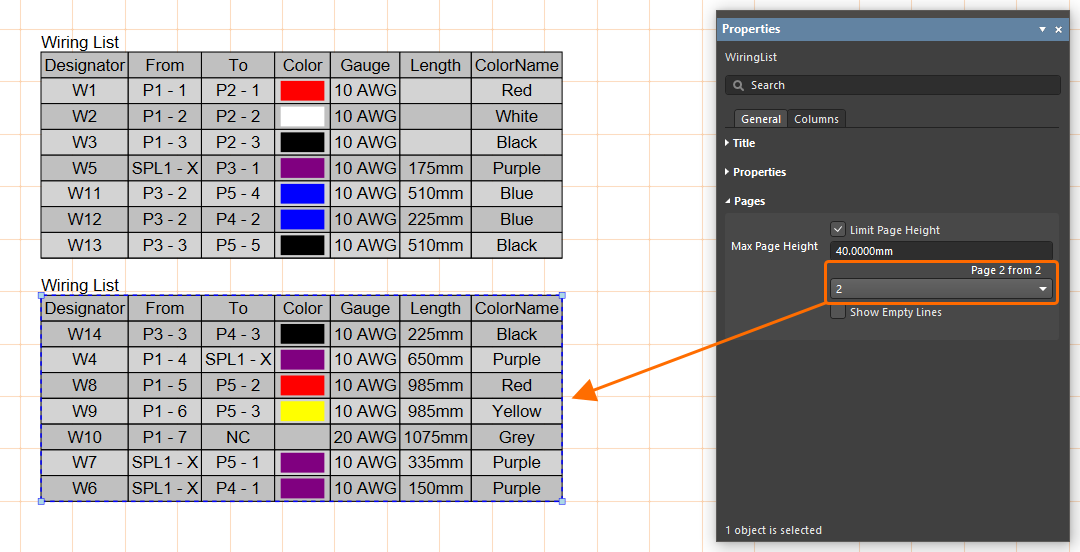
The wiring list of an advanced harness design may have a large number of entries, which can be difficult to fit into a drawing document as a single table. Rather than resorting to font and table scaling, multiple custom table entries, or an external document, you can 'split' a wiring list table so that the wiring list will be presented over a number of 'pages.'
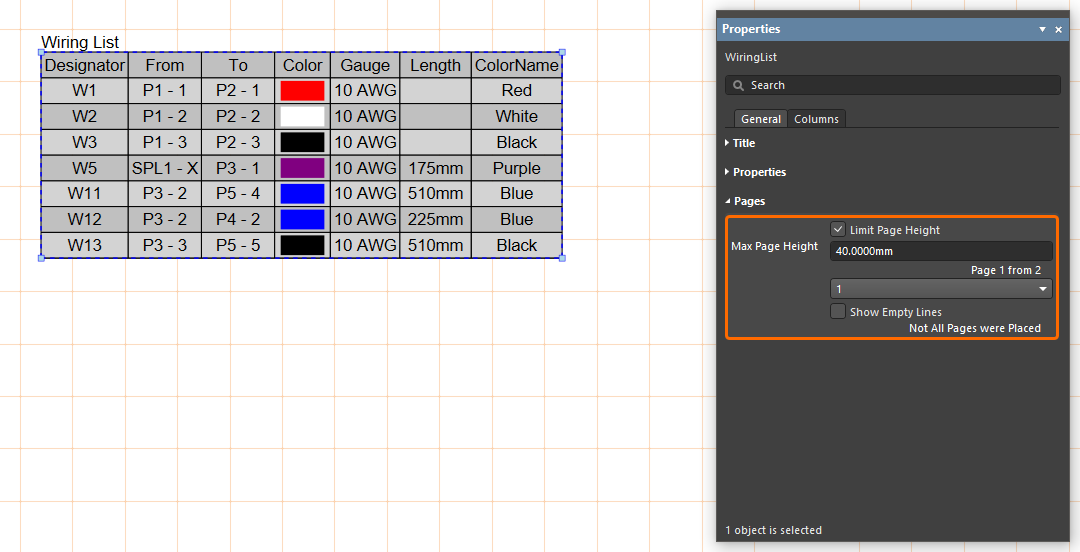
In the Properties panel for a placed wiring list, enable the Limit Page Height option in the Pages region to restrict the height of the table to the nominated height entry (Max Page Height) and, therefore, the number of lines shown in the table.
The editor detects that the entire Wiring List is not shown, as indicated by the panel's Page entry (for example, 1 from 2), and the associated drop-down menu allows you to nominate which page is shown. To add further pages of the Wiring List, place another Wiring List (Place » Wiring List) and specify the next Page in the Pages region of the Properties panel.
Connection Table
A Connection Table is an automatically generated table object that shows the wires connected to every connection point (connector pin, splice, etc.) in the harness.
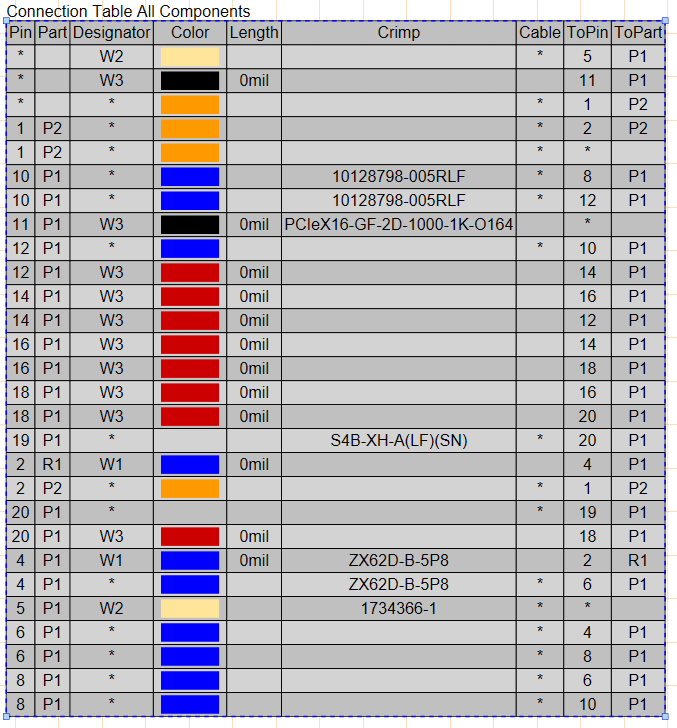
A Connection Table (for all components)
To place a Connection Table, select Place » Connection Table from the main menus or use the Connection Table command from the Active Bar.
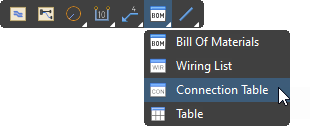
Select the placed Connection Table to access its property settings in the Properties panel. This provides configuration options for most aspects of the Connection Table, including its visual attributes and data content. You can use the Component option to show the data of all project components in the table or the data of a specific component or splice.
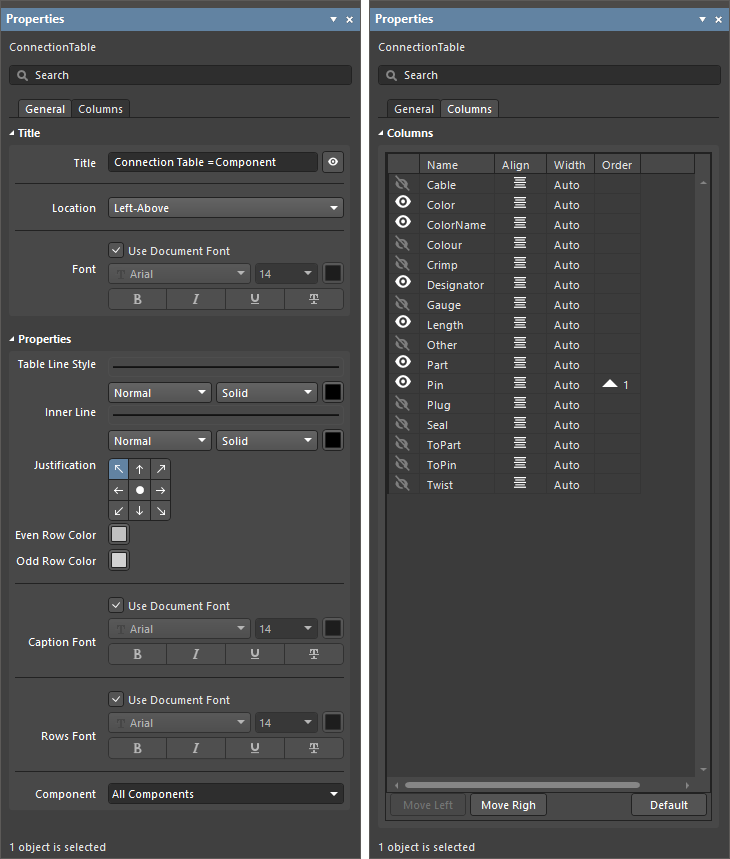
The Properties panel in its ConnectionTable mode (the General and Columns tabs)

